Basics | Applications | Howtos | Plugins
A guided tour into Lino Noi
This document presents Lino Noi to end users. It uses the form of a guided tour.
Lino Noi is the ticket management and time tracking system used by the Synodalsoft team.
Sign in
Point your browser to https://noi1r.lino-framework.org.
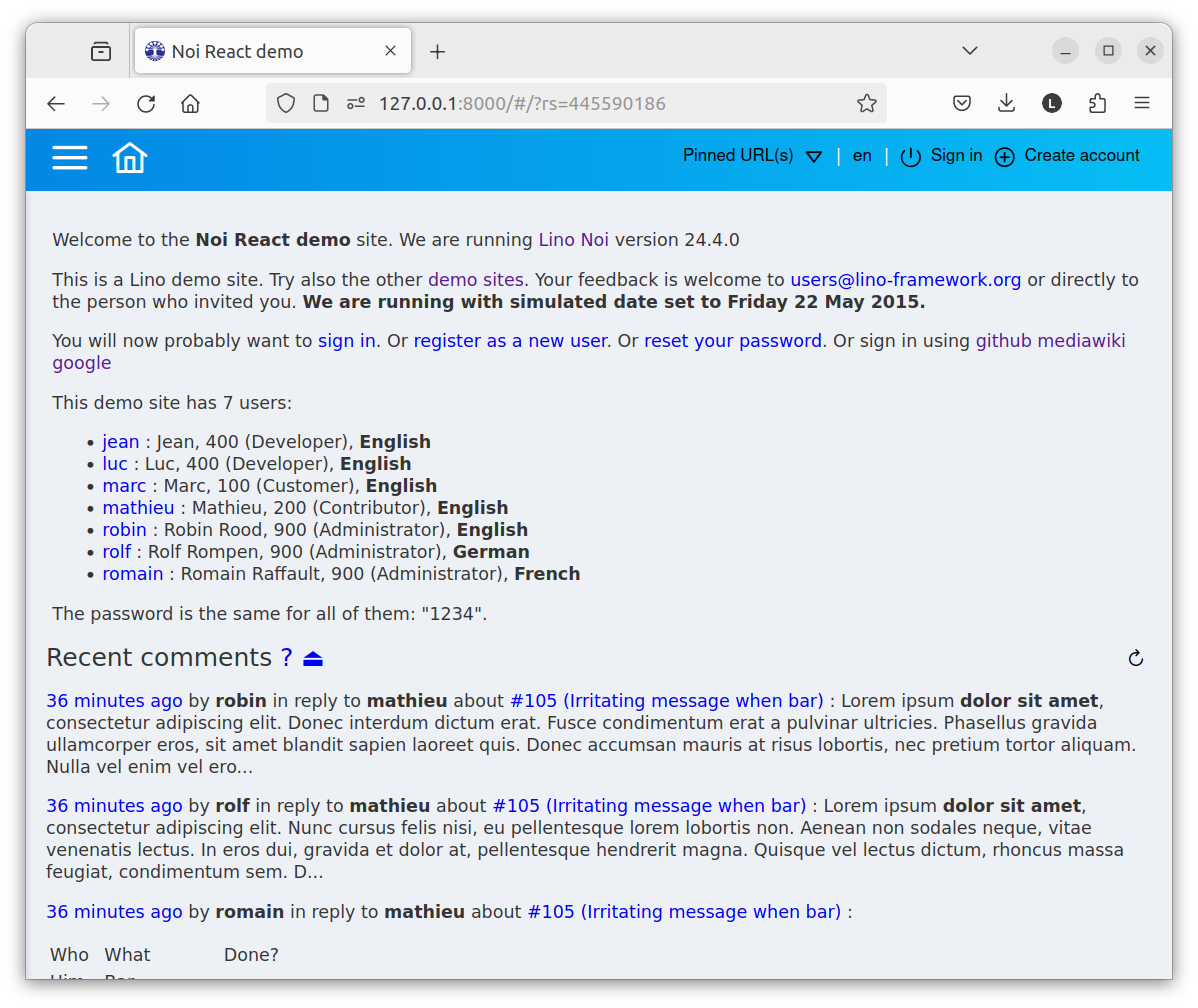
This is a public online demo site, so don’t be afraid of breaking anything.
This site runs in demo mode: all users have the same trivial password “1234” and clicking on their name fills the password for you.
Click on “jean”. This opens the Sign in dialog window.
Hit ENTER without changing anything to confirm the window.
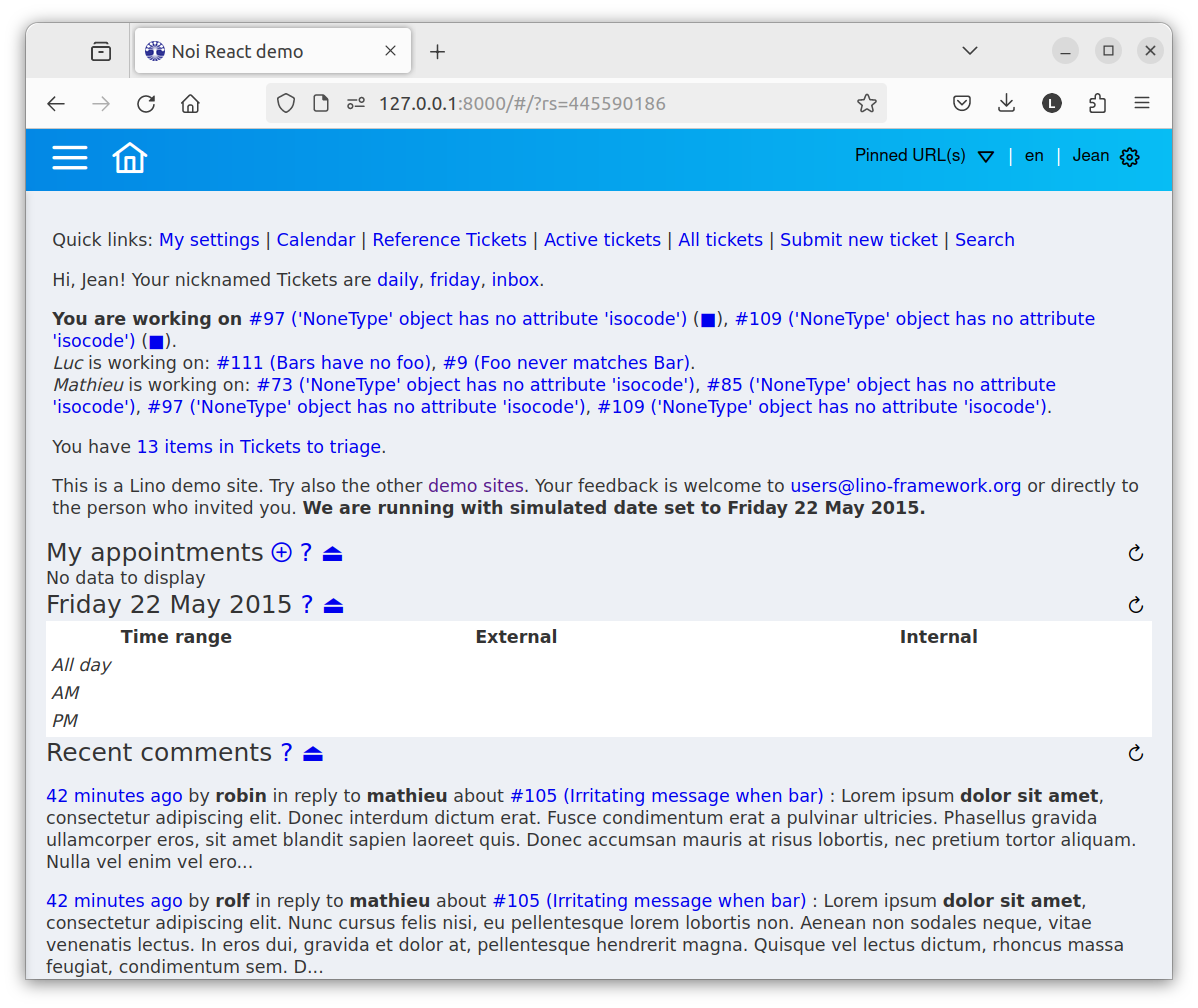
You are now authenticated as Jean and should see the following screen.
Click on the word “Jean” in the upper right corner. This expands the user menu.
The user menu has at least two items: Sign out and My settings.
Click on Sign out. This returns you to the initial screen.
Note that the main page for anonymous users is actually quite similar to the one you see after signing in. For example it contains two tables Recent comments and Public tickets. Public tickets and comments in Lino Noi are visible to the world.
Find the text “You will now probably want to sign in.”
Click on the words “sign in”.
This opens the normal Sign in dialog window where you have to type username and password yourself.
Type “jean” and “1234”, then hit ENTER.
Keep in mind: There are two ways of signing into a demo site: (1) the quick way (to click on a username) is good to know as a developer, and (2) the normal way to be used on a production site.
The main page
Now you are authenticated as Jean. Let’s have a look at your main page. The first text item in your main page are the quick links:
Quick links: My settings | Calendar | Reference Tickets | Active tickets | All tickets | Submit new ticket
Click on any of them, then click the Back button of your browser to return to the main page.
Click on any quick link and then hit the home button (
 ) (the one in your
Lino window, not the home button of your browser) to return to the
main page.
) (the one in your
Lino window, not the home button of your browser) to return to the
main page.
After the quick links come the welcome messages:
Hi, Jean! Your nicknamed Tickets are daily, friday, inbox.
You are working on … (■)
One of the welcome messages is We are running with simulated date set to
Friday 22 May 2015.. That’s because this demo site has the_demo_date set to 20150522.
We will talk about the other welcome messages in the next section, let’s first finish our tour of the main page.
The dashboard
After the welcome messages comes the dashboard. The dashboard is a configurable list of tables to display on your main page.
After each table heading in the dashboard there are several clickable symbols:
 , ? and ⏏. Check whether they work as expected.
The first table on your dashboard is “My appointments”. This table is empty for Jean, it says just “No data to display”. This is an exception to the rule. The dashboard usually doesn’t show empty tables. When a dashboard item has no data to display, then it’s simply not rendered at all.
The next table on your dashboard is “Friday 22 May 2015”. This is a daily calendar view.
The next table on your dashboard is “Recent comments”. Don’t read them because the demo site contains just automatically generated silly comments.
Scroll down your dashboard until you find the table “Worked hours”.
We are going to move the “Worked hours” table to the top of the dashboard.
Click My settings in the user menu.
Select the Dashboard tab
The table is empty (unless somebody else tried the following on this demo site today)
Click on the
 button to fill the table
Find the entry for “Worked hours”
Change the “No.” column from 10 to 1. That entry gets moved to the top of the list.
Working as Jean
The messages You are working on ... (■) are there because the demo
database of Lino Noi simulates a situation where Jean has started several work
session on these tickets. Yes, it is allowed to work on multiple tickets at
once.
Click on the text “#97 (‘NoneType’ object has no attribute ‘isocode’)” in order to see the detail window of ticket #97.
Find the Workflow field. This field shows a series of clickable symbols. The first one is either ▶ or ■: you can either start working on this ticket, or stop working on it. The other symbols are mostly for changing the state of the ticket.
Back in the dashboard, click on the (■) of some
You are working on
... (■)
message and poof! the message disappears. That’s of course because the (■) means that you stop working on that ticket.
Create a new ticket
Click the quicklink in the dashboard.
Lino opens the following dialog window:
Insert a new TicketSummary: ________________Ticket type: ____________Priority: 30End user: ______________Team: __________
Type “Getting started with Lino Noi” in the Summary: field.
Leave the other fields as they are for this time.
Click the Create button or press Ctrl+S to confirm the dialog window.
The summary of a ticket is the only mandatory information.
Click the ▶ icon in the Workflow field.
You can see that session in the Sessions panel, which should say something like:
Active sessions: Jean since 17:29:53.750437 ■
You can instruct Lino to automatically start a new working session each time you create a ticket by checking the Open session on new ticket checkbox in your user settings.
Type the text “I’m following the crash course.” into the My comment field and hit Ctrl+S to save.
If the start time of your working session is wrong, then go to your user settings and check the Time zone field.
Tickets to work
The Tickets to work table is your to-do list.
Worked hours
This table is a summary of what you have been doing during the last seven days. It is how a typical week might look for you. When you hover the mouse over a ticket number, it shows the ticket’s summary.
Click on any date to see all sessions of that day. This gives you an overview of your hours worked today.
You can manually change the start and end times of your sessions. Lino Noi trusts you 100% regarding your worktime tracking.
The ▶ icon actually simply creates a new row in this table, with the current time as Start time. And the ■ icon actually just sets the End time of its row to the current time.
A break time will reduce the duration.
Working on several tickets at once leads to nested sessions.
It happens that you forgot to click the stop button (■) when you stopped working on a ticket. In that case, look at the Worked hours table, click on the day where you started working, find the session that has an empty End time field and manually edit that field to type your estimated end time. That’s all.